Sender profiles define who your message is from, as well as what happens to replies. A good sender profile will help ensure your messages look professional and not spammy by allowing you to specify the name of the message sender or the name of a regularly scheduled email, such as Brief. Sender profiles also give you the ability to specify an email to which any replies to your message will go.
If you haven’t created a sender profile, your messages will look as if they are coming from “Your Department <[email protected]>” and any replies will go to the email address you specified when the account was created.
Create a Profile
To create a sender profile, log in to Salesforce and follow the steps below.
- Click the Admin tab in the navigation bar.
- Click Send Management.
- Click Sender Profiles.
- Click Create.
Sender Information
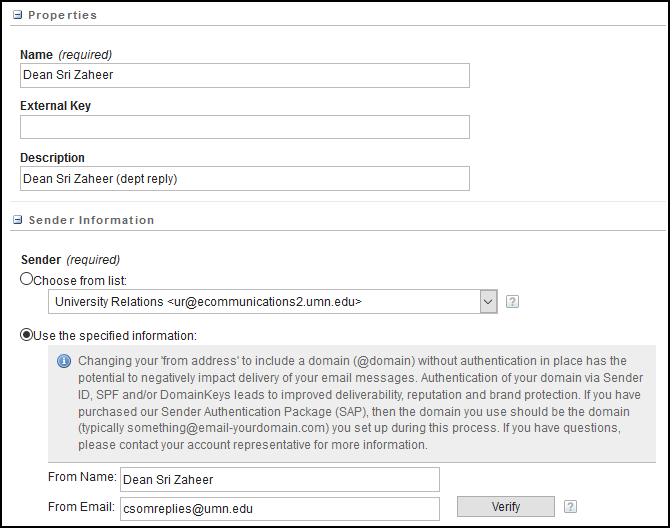
Begin by giving your profile a name in the “Properties” section. You’ll select your profile based on this name when you’re ready to send your message.
In the “Sender Information” section, to have your messages show the name of an ongoing email, such as Brief, or to look as if they’re coming from a person, select the “Use the specified information” field. You can use the “From Name” field for your dean’s name, for instance, with the “From Email” field as the departmental email address that would receive any replies. See the example below.
If you do not want to receive replies, the “From Email” section can specify the University’s no reply email address: [email protected]. This will help your recipients understand that their replies will not receive a response.
Custom Reply Mail Management Settings
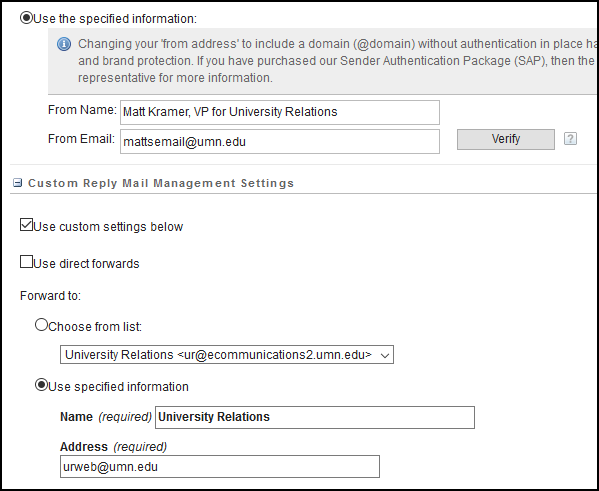
Alternatively, you can make your message appear to come from one email address, but specify a different address for replies. In the example below, the message will appear to come from “[email protected],” but replies will actually go to [email protected].
This is done by selecting the “Use custom setting below” checkbox and the “Use specified information” radio button, then specifying the name and address for the replies.
Using Noreply
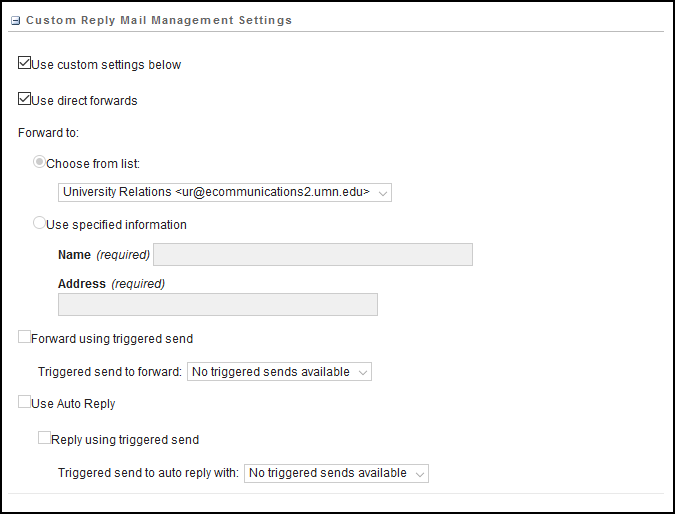
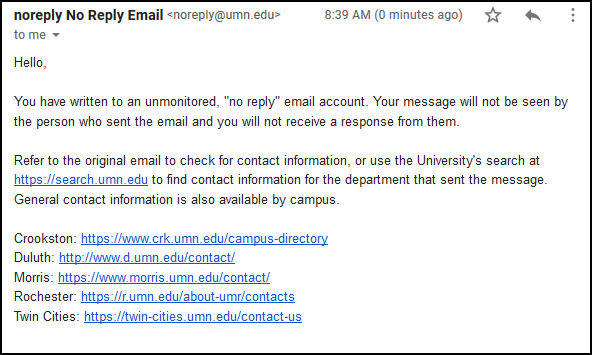
If you choose to use [email protected] as your “From Email” address (specified in the Sender Information section), you should also check the “Use direct forwards” checkbox in the Custom Reply section. This ensures that replies go directly to the [email protected] inbox, which triggers a vacation message notifying the sender that their reply will not be seen by anyone.
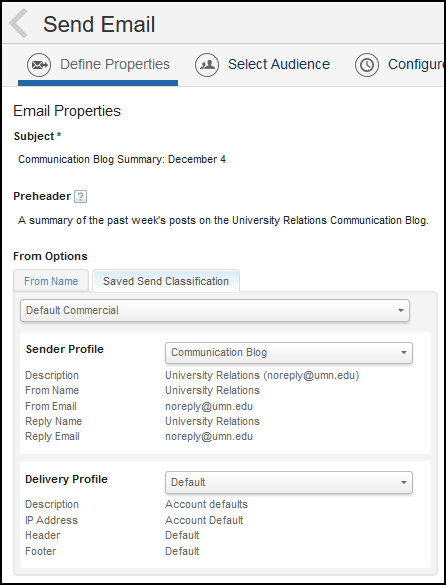
During the Send Email process, a Sender Profile is chosen on the Email Properties page.
View all Marketing Cloud Blog posts on our website.
Contact the SMC Admins for help at [email protected]
Send your blog ideas or submit a blog post to [email protected]